Activity 5.1 Introduction to Object-Oriented Programming
Introduction
Throughout this course, we’ve covered many constructs that allow us to design and build programs. Variables, the primitive data types (strings, numbers, and booleans), control structures, data structures, and methods allow us to build any kind of application. But there are ways we can expand upon these ideas and organize them in such a way that are familiar to us. That’s where object-oriented programming and design come into play.
Object-oriented programming, or OOP for short, is a way to model our programs around the literal objects around us. Think nouns: people, places, things, and ideas. In reality, we’re just organizing code in a different way. OOP is not mandatory, but it is a great way to design programs. The whole point of object-oriented programming is to assist you in writing code that is reusable and maintainable. Most of the popular programming languages we use are either entirely object-oriented languages, or support object-oriented programming (C++, C#, Java, Python, Ruby, JavaScript).
C# is known as an object-oriented language. Meaning, the entire programming language is built with OOP in mind. To understand the inner workings of C#, you need to understand OOP. Where do you begin? We start with two concepts, classes and objects.
Classes and Objects
At the heart of a traditional object-oriented programming language are classes and objects. Although you may not realize it, we’ve been working with these things the entire course.
An object is an instance or occurence of something. For example, we are all instances of people. Any noun can count as an object. For example, an animal, a person, a shape, an appliance, a bank account, etc. are all valid objects. An object is also known as an instance, which is an occurence of some thing. For you example, you and I are both instances of people. We are both categorized as people, but we are disntinct occurences of a person. Although rude, you could refer to a person as a person object. Therefore, you will often see me use the words object and instance interchangeably.
A class is a blueprint or template that defines something. A class is also referred to as a type, because when you create a class, you’re actually creating your own custom data type. The things contained within a class are known class members, or members for short. Classes and objects are closely related. A class defines the thing, and an object is an actualy occurence, or instance of that thing. You can create as many objects of that class as you need.
Where does this all come into play when programming? OOP is all about desiging our programs into classes. We then create instances of a class, i.e. objects, and interact with those objects in our program. Again, although this is all foreign, we’ve actually been working with objects this entire time.
Class Definitions and Members
When writing a class, you’re describing three major things:
- Identity
- Attributes
- Behavior
The identity defines what the class is. The attributes describe the values We use variables to store those attributes. The behavior describes what actions an object can perform. We define behavior using methods. The variables an methods defined in a class are referred to as class members, or members for short.
Variables defined in a class are referred to as fields, as in data fields, or instance variables. That’s because each dog object (or instance) will have it’s own copy of those variables. We’ll discuss this more below.
Example Dog Class
| Identity: Dog Class |
|---|

|
| Attributes: name, breed, age, color |
| Behavior: Bark(), Eat() |
| Dog Object |
|---|

|
| Fido, Greyhound, Age 3, gray |
| Fido can Bark() and Eat() |
| Dog Object |
|---|

|
| Dodger, Ger. Shep, Age 6, brown |
| Dodger can Bark() and Eat() |
| Dog Object |
|---|

|
| Pooch, Husky, Age 1, blue |
| Pooch can Bark() and Eat() |
| Dog Object |
|---|

|
| Star, Shiba Inu, Age 2, tan |
| Star can Bark() and Eat() |
class Dog
{
    string name;
    string breed;
    int age;
    string color;

    void Bark()
    {
        Console.WriteLine("Woof!");
    }

    void Eat()
    {
        Console.WriteLine($"{name} is eating.");
    }
}
The dog class in the above has the following members: 4 fields (name, breed, age and color), and 2 methods (Bark and Eat). Notice that a method can access the various fields declared in the class. for example, the Eat() method is using the name field in its body.
Note: Class definitions are defined in their own file by convention. You name the file after the name of the class. Therefor, the Dog class should be written in a file named Dog.cs.
Instantiating an Object
Once you’re finished creating a class, you use it by instantiating objects of that class. In other words, you create Dog objects.
Dog pet1 = new Dog();
Dog pet2 = new Dog();
This example creates two variables named pet1 and pet2. The declared type is Dog. Remember, a class is just a custom data type. To create a new Dog object we use the new keyword, and a special method called a constructor. A constructor is a method that has the same name as a class, and it initializes memory for a new object.
Since an object is stored in it’s own place in memory, each object maintains it’s own state, meaning they get their own copy of the fields. pet1 has a seperate name, breed, age, and color from pet2.
Access Modifiers and the Dot Operator
If you’re following along with the example, you may get a syntax error in your main program file saying that Dog is inaccessible. In OOP, we have to define what classes and members are accessible from the outside. For now, just know that the public keyword is used to denote that a class or class member is accessible from outside the definition. The public keyword is known as an access modifier. Let’s add public keywords to the Dog class. By convention, public fields are also capitalized. We’ll change that too just to follow convention.
public class Dog
{
    // Capitalize public fields
    public string Name;
    public string Breed;
    public int Age;
    public string Color;

    public void Bark()
    {
        Console.WriteLine("Woof!");
    }

    public void Eat()
    {
        Console.WriteLine($"{Name} is eating.");
    }
}
Now everything is accessible from outside the Dog.cs file. This isn’t great practice, but we’ll learn good practices later on regarding access. The pet1 and pet2 members can now be accessed in our main program. We use the dot operator (.) to access any of our fields or methods. We can use these
Dog pet1 = new Dog();
Dog pet2 = new Dog();

pet1.Name = "Sparky";
pet1.Breed = "Boxer";
pet1.Age = 1;
pet1.Color = "brown";

Console.WriteLine($"I have a {pet1.Color} {pet1.Breed} named {pet1.Name}.");
pet1.Eat();
pet1.Bark();
Output
I have a brown Boxer named Sparky.
Sparky is eating.
Woof!
Classes are Reference Types
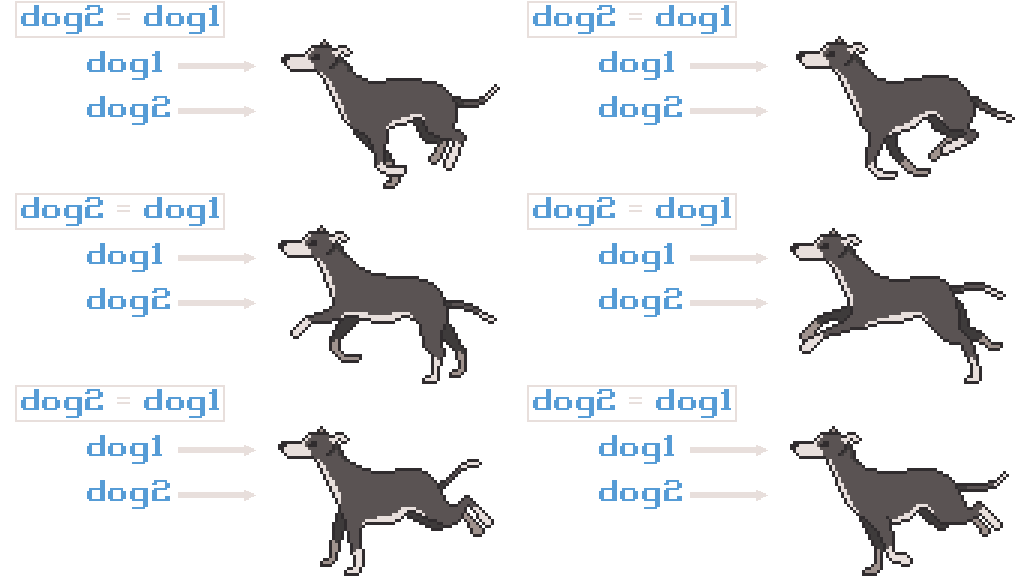
In Lesson 3.6, we discussed the distinction between value types and reference types. Value types store their actual data directly. When you assign a value type variable to another variable, the data is copied, meaning each variable has its own copy of the data. Reference types, on the other hand, store a memory address that points to the actual data. When you assign a reference type variable to another variable, only the memory address is copied. As a result, both variables refer to the same data in memory.
Classes in C# are reference types. This means if you assign one class instance to another variable, both variables will point to the same object in memory. Any changes made to the object through one variable will be reflected when accessed through the other variable.
Example: Copying references
Dog dog1 = new Dog();
dog1.name = "Fido";
dog1.breed = "Greyhound";
dog1.age = 3;
dog1.color = "gray";

// dog2 and dog1 are pointing to the same object
Dog dog2 = dog1;
Using the this Keyword
The this keyword is a reference to the current instance of a class. It allows an object to refer to its own members (fields or methods). While often optional, this is necessary when distinguishing between a field and a parameter or variable with the same name. Using this makes your code more explicit and easier to read, which is especially useful in later topics.
public void Eat()
{
    Console.WriteLine($"{this.Name} is eating.");
}
Introduction Summary
You may be wondering where do you start when trying to design a program using OOP. For now, just worry about this new syntax, because we’re only dipping our toes in the OOP water. Object-oriented programming requires a shift in the way you reason about your code. With time and practice, you will become comfortable writing programs using this new style.
- Object-oriented programming (OOP) is a way to design programs around things in the real world (or our imagination).
- OOP helps you design code that is maintainable and resuable.
- Design code by writing classes. A class is like a template or blueprint for something.
- A class is just a custom data type.
- Variables and methods defined in a class are referred to as class members.
- Variables in a class are called fields or instance variables.
- To make members accessible outside of the class, prefix them with the public keyword.
- The this keyword is used to explicitly reference the current object’s members.
- Objects are instances of a class.
- An object gets its own set of fields when it is initialized.
- Object fields and methods are accessed using the dot operator.
- Classes are reference types
- If a variable of a given class type is assigned a value of another variable, only the memory address is copied. As a result, both variables refer to the same data in memory.
Skills to Practice
- Writing code across different files
- Creating a class and instantiating objects
- Accessing members
Instructions
Setup
- Create a new C# console application. Name the project 5.1 Classes and Objects.
- Click Create.
- In your project, create a new file titled Pokemon.cs
This is the first activity where you are typing in two different source files, Program.cs and Pokemon.cs. Make sure you are typing your activity code in the correct file.
Code
Pokemon.cs
public class Pokemon
{
    public string Name;
    public string Type;
    public int MaxHp;
    public int CurrentHp;

    public int Attack()
    {
        Random random = new Random();
        Console.WriteLine("Attacking!");
        return random.Next(1, 6);
    }

    public void Heal()
    {
        // Don't heal more than your max health
        if (CurrentHp + 5 >= MaxHp)
        {
            CurrentHp = MaxHp;
        }
        else
        {
            CurrentHp = CurrentHp + 5;
        }
    }
}
Program.cs (or main.cs in Replit)
Pokemon player = new Pokemon();
Pokemon enemy = new Pokemon();

player.Name = "Pikachu";
player.Type = "Electric";
player.CurrentHp = 20;
player.MaxHp = 20;

enemy.Name = "Onyx";
enemy.Type = "Rock";
enemy.CurrentHp = 17;
enemy.MaxHp = 17;

bool winner = false;
int damage;

Console.WriteLine("-- Pokemon Tournament Demo --");

// Keep battling until either your Pokemon faints or you win
while (player.CurrentHp > 0 && !winner)
{
    Console.WriteLine($"{player.Name}: {player.CurrentHp}");
    Console.WriteLine($"Enemy {enemy.Name}: {enemy.CurrentHp}\n");
    Console.WriteLine("-Menu-");
    Console.WriteLine("1) Attack");
    Console.WriteLine("2) Heal");
    Console.Write("-> ");

    string choice = Console.ReadLine();

    if (choice == "1")
    {
        damage = player.Attack();
        Console.WriteLine($"{player.Name} did {damage} damage!\n");
        enemy.CurrentHp -= damage;
    }
    else if (choice == "2")
    {
        Console.WriteLine($"{player.Name} heals itself.\n");
        player.Heal();
    }
    else
    {
        Console.WriteLine("Invalid choice... Lost turn...\n");
    }

    if (enemy.CurrentHp <= 0)
    {
        winner = true;
        break;
    }

    // Enemy turn
    damage = enemy.Attack();
    Console.WriteLine($"{enemy.Name} attacks and does {damage} damage!\n");
    player.CurrentHp -= damage;
}

if (winner)
{
    Console.WriteLine($"Defeated {enemy.Name}!");
}
else
{
    Console.WriteLine("Game over...");
}
Debug
-- Pokemon Tournament Demo --
Pikachu: 20
Enemy Onyx: 17

-Menu-
1) Attack
2) Heal
-> 1
Attacking!
Pikachu did 5 damage!

Attacking!
Onyx attacks and does 1 damage!

Pikachu: 19
Enemy Onyx: 12

-Menu-
1) Attack
2) Heal
-> 2
Pikachu heals itself.

Attacking!
Onyx attacks and does 5 damage!

Pikachu: 15
Enemy Onyx: 12

-Menu-
1) Attack
2) Heal
-> 1
Attacking!
Pikachu did 5 damage!

Attacking!
Onyx attacks and does 3 damage!

Pikachu: 12
Enemy Onyx: 7

-Menu-
1) Attack
2) Heal
-> 1
Attacking!
Pikachu did 4 damage!

Attacking!
Onyx attacks and does 4 damage!

Pikachu: 8
Enemy Onyx: 3

-Menu-
1) Attack
2) Heal
-> 1
Attacking!
Pikachu did 3 damage!

Defeated Onyx!
Tips, Tricks, and Reflection
- Object-oriented programming may seem overcomplicated at first, but stick with it. You will eventually just get it. Keep practicing!